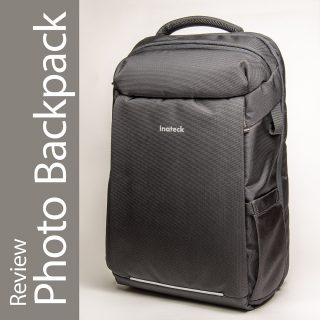
 Yeah, I know: „Buy nice or you buy twice.“, „Quality has its price.“, „For professional results you need professional tools.“ and „Bold equipment creates a bold image.“
Neglecting the wisdom, I recently looked for a photo backpack that can do a lot without forcing me to rob a bank.
So far, I use the really great large shoulder bag Jackpack 9000 by photo bag taylor Crumpler for my medium-sized photo projects and also for my workshop trips. On the functional side I am very satisfied with it. Only my orthopedist advises me after some shoulder discomfort, strictly to stop carrying around the awsome Jackpack fully loaded (at least 27 lbs).
So I’m looking for a photo backpack, which distributes the load on my body much better. What quickly turns out: Amongst the bags from known manufacturers, I either find limited functionality or loose a small fortune. In the cheap Amazon shelf, I then find a suitable supposed to be no-name backpack and order it. This is a first test / review.
What the New Photo Backpack Should be Able of
And yet, I have precise ideas that go beyond the standard expectations such as the safe transport of valuable equipment and comfortable carrying behavior. Finally, the new workhorse should not only bring my photo equipment safely from A to B, but should also be compatible with carry-on luggage demands and serve as a daypack for one or two nights‘ survival in a distant civilization. So, size matters, and:
- My 15″ laptop should fit in.
- It should provide a separate padded compartment for my iPad.
- A small travel tripod should be stored INSIDE the backpack (and not buckled outside).
- I need an easily accessible small outer compartment for the fluid collection, which must be presented before traveling with carry-on luggage.
- In addition, the camera compartment should have an internal cover.
- Nice would be a straight exterior design without many buckles and straps, which does not immediately reveal the possible content.
First Round Candidates
These were the backpacks of my initial shortlist (all following product links lead to detailed information on Amazon.de):
- Crumpler Jackpack Full Photo Backpack (because I had very good experiences with Crumpler)
- Manfrotto Mover-50 (because it looks coool and has an interesting changing system)
- Manfrotto Advanced Befree (because it has a separate compartment for the travel tripod )
- Lowepro ProTactic 450 AW II (because it is very sturdy and comes from a manufacturer with a lot of photo bag experience)
- Think Tank Airport Essentials (because Think Tank Photo gets the best reviews from professionals)
These really great photo backpacks from the top brands Crumpler, Manfrotto, Think Tank and Lowepro always force me to make any concessions. So I dare to look outside the box and make friends with this backpack:
No real type name, very short description, but an attractive price of just under EUR 60 (on 04-17-2019). The comparable branded products are between approx. EUR 110 and 250.
On screen, this item essentially seems to fulfill my wishes. I accept the supposed risk and order on Wednesday shortly before Easter, already on Thursday it is here.
The First Impression
In contrast to many reports on cheap bags from Asia, the backpack emits no strange chemical odor. Ok, at first it smells slightly grumpy, but that completely vanishes within the first hour after unpacking.
All seams seem to be very solid.
The Exterior of the Photo Backpack
The backpack is big, but not monstrous. Finally it should fit in a carry-on luggage compartment. Also because of its simple shape it makes a compact impression. There is a single strap with a buckle, for mounting a larger tripod on the side. I remove it instantly and store it later in one of the inner pockets.
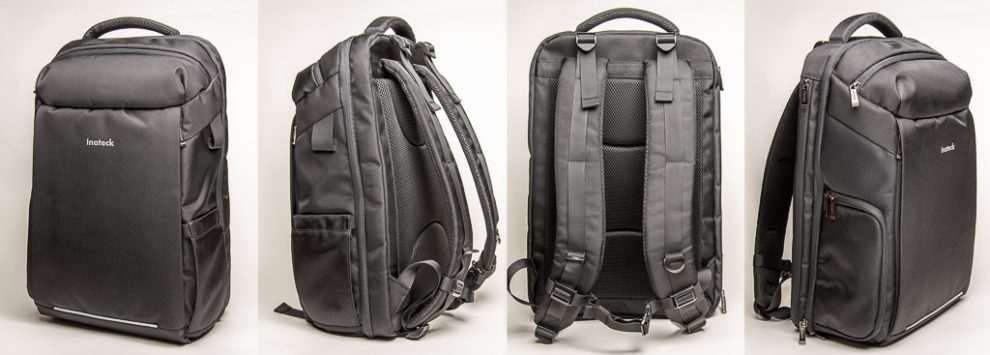
The exterior of the Inateck Backpack – From left: Front, right side, back, left side
Straps and Carrying Handle
The straps are wide and well padded. With a small chest strap you can connect them with each other for carrying comfort on long hikes. The good: This chest strap is slightly elastic so that it does not loose tension in spontaneous movements.
At the upper connection to the backpack body there are once again belts and buckles, widely known from some hiking rucksacks to fix small rolls (sleeping pad, sleeping bag) on top of the backpack. Product photos show an alternative for mounting a tripod instead. I don’t think that this is very convenient. On the other hand, I could imagine putting there a jacket or a fleece sweater when on longer trips. At the moment, however, I do not see any use for this feature. So I set the straps to the same length as the risers. So none of them dangles around any longer.
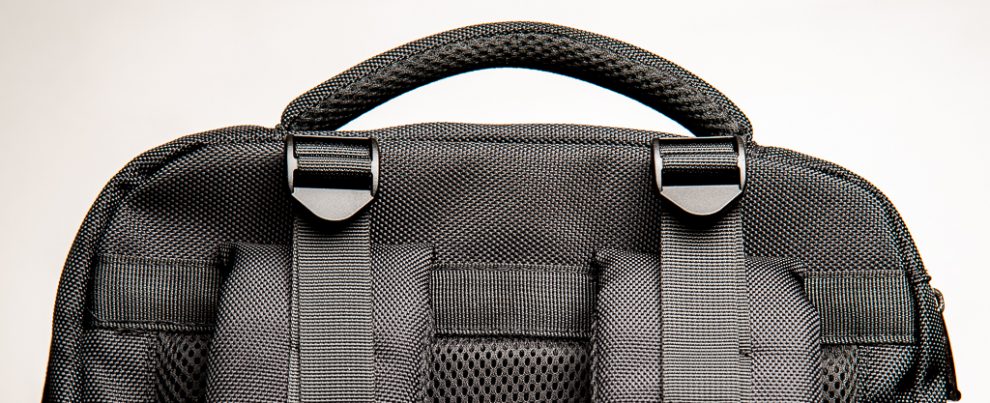
Handle and straps are very sturdy and handy. The extra straps have no function for me.
At the top of the backpack there is a padded textile carrying handle. Its function is probably self-explanatory.
Zippers
The most important zips are splash-proof. All zippers run with perfect resistance (as I know from my big Lowepro Photo Trolley), but are very comfortable to use.
Material and Stability
The photo backpack has an outer skin made of conventional rough water-repellent nylon fabric. Splash protection is obviously given. But there is also a rain cover for use in precipitation.
Due to the surrounding foam padding and the fixed back pad, the backpack body is also relatively stable when open and does not collapse when empty or half-loaded.
The Interior of the Photo Backpack
To access the main compartment of the backpack, you open the back cover on three sides. This has the advantage that bad boys can not easily gain access to the content unnoticed when the backpack is worn on the back.
The backpack is lined with waterproof 190T polyester.
Partition Cover
Between the lid and main compartment there is a mesh partition cover, which is secured with two zippers. It prevents equipment from falling out in case of urgent handling or airy loading. At the same time, the black gauze offers a slight viewing protection for potentially valuable equipment.
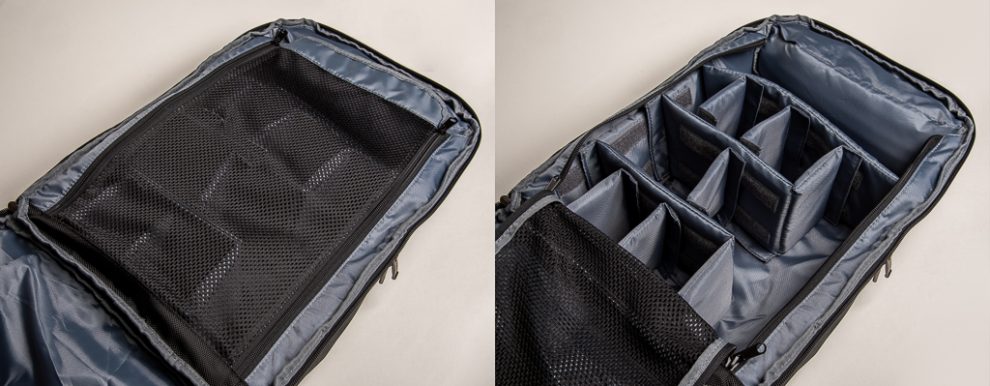
The mesh separator protects the equipment from falling out and from curious looks.
Main Compartment and Dividers
The main compartment itself can be adjusted into individual areas for camera, lenses and accessories by various nylon separators with very stable foam cores. They are connected with each other and with the body by Velcro fasteners. However, the system does not seem to be very flexible, since the attachment points are fixed by Velcro patches. I’ll probably have to fiddle about a bit to find a solution to place my travel tripod in this grid. If you use the given layout, then there is a lot of space left and right of the camera body, which you may somehow fill with soft equipment.
Side Access
There is also a side door for the active photographer. This provides access to the camera even when the main compartment is closed. Simply slip out of the right shoulder strap and swing the backpack forward over the left strap. Immediately the side flap presents itself. Its opening is so big that I can even take out a Nikon D750 with mounted L-bracket.
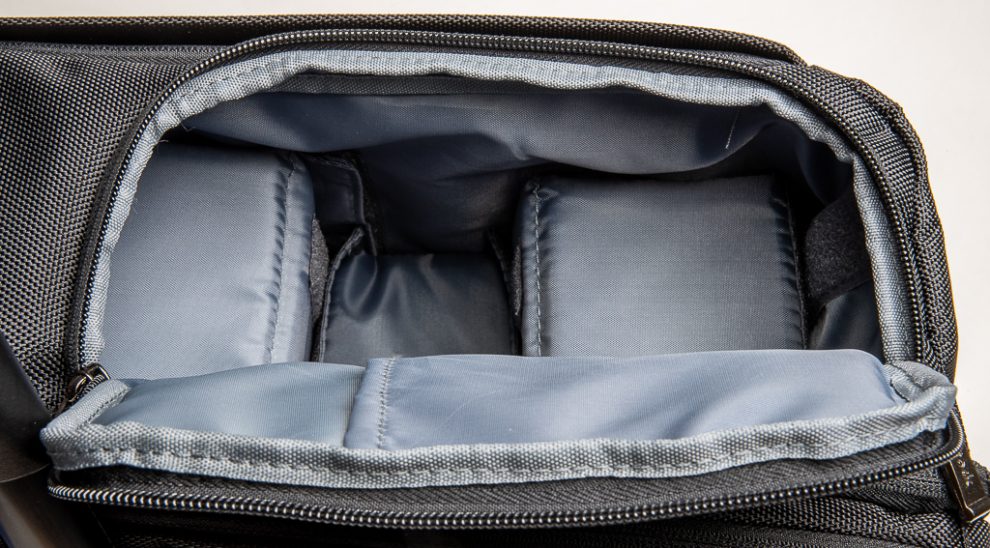
Side entrance – Via this zippered flap you may get access to the camera without opening the entire backpack.
Interior Compartments
There is a flat net pocket inside of the backpack lid. This can be good for filters, gels and other thin accessories.
Underneath there is a flexible nylon pocket with an elastic band. This is good for bulky accessories such as cables and power supplies. While traveling, that’s where I fix my flat laundry bag for shirts and T-shirts.
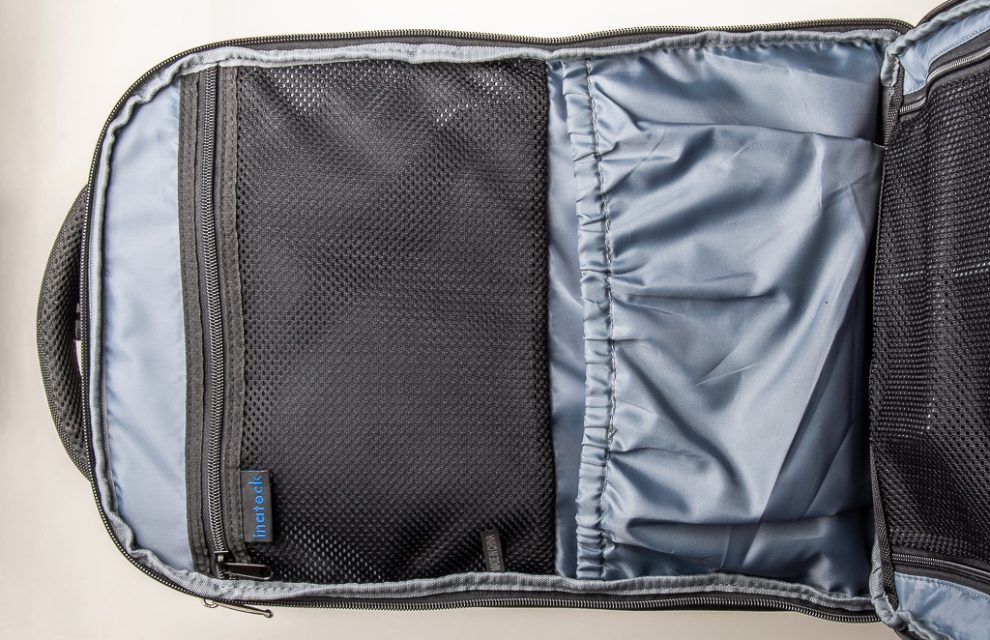
Mesh and rubber band compartment at the interior side of the back cover.
On the side door, there is also a small pocket, which can be used for memory cards or similar flat objects.
Notebook Compartment
The lid, which is located between the backrest pad and the main compartment, contains a compartment for a 15-inch notebook, which is accessible from the side. My 15.6-inch Dell Inspiron with 15″ x 10.2″ x 0.8″ just fits through the zipper opening.
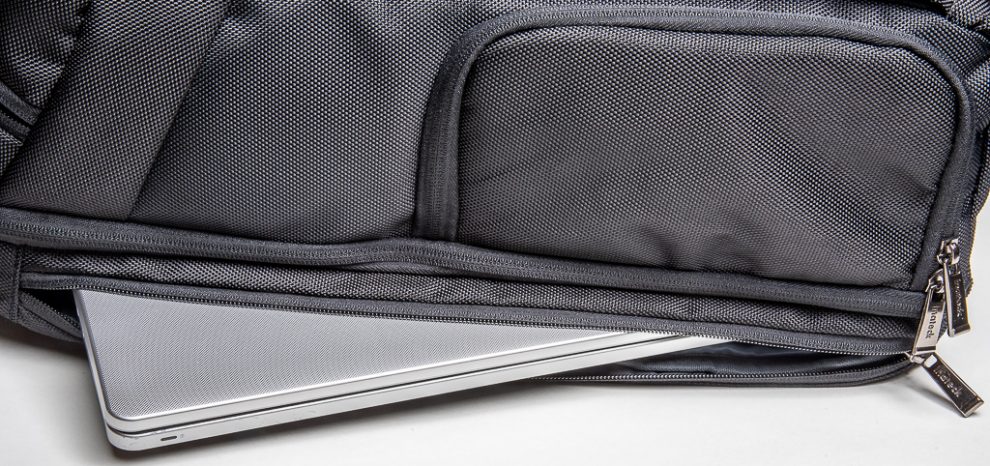
A 15″ notebook compartment is located in the back cover.
Top Compartment
In the upper part of the backpack, there is a small compartment where the rain cover is inserted. It can be reached from the top via a zipper. Here also can be placed small parts, on which you may need fast access. That’s where I will stow my toiletry bag suitable for carry-on luggage, which can be presented quickly to the security check at the airport, without opening the entire backpack.
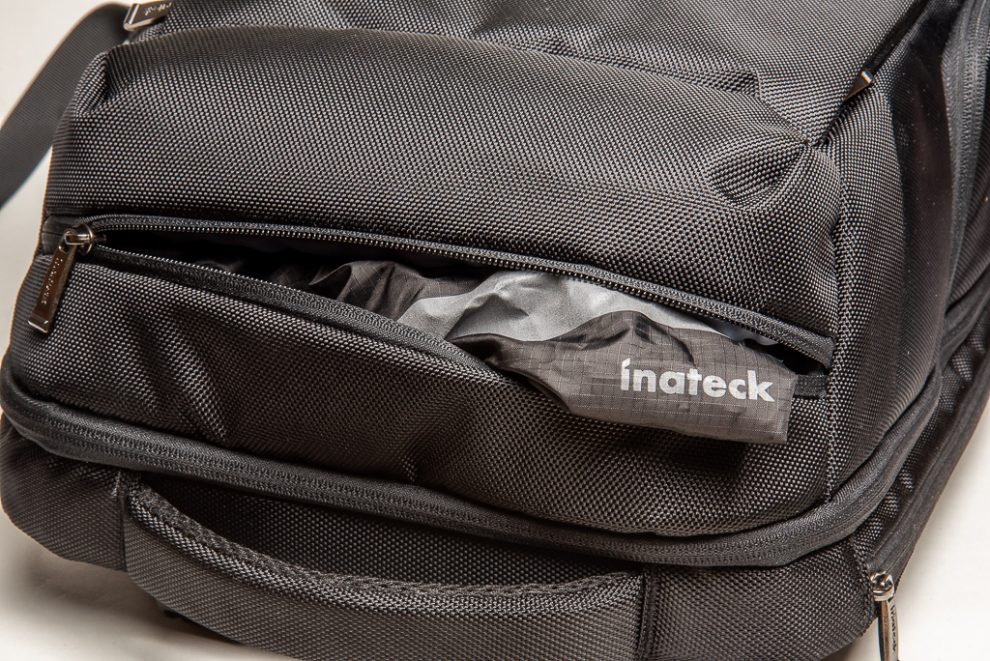
Top compartment with rain cover
Side Compartment
On the side below the mount for a tripod there is a flexible side pocket. Either a water bottle can be conveniently positioned here or one of the tripod legs fixed, if the lateral transport is an option.
Exterior Pockets
On the outside of the backpack, concealed zippers release two flat compartments where papers or my tablet can be stowed.
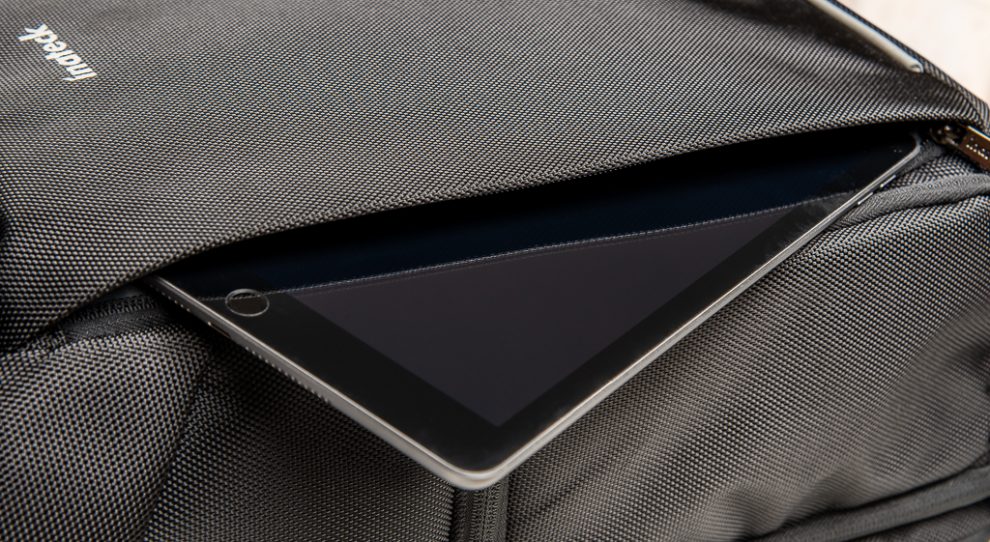
The exterior back pockets can take documents or a tablet computer.
Technical Data (Measured by myself)
(without straps and handle)
(when emptying the top compartment, the length increases to 17.3″)
access through zipper is 15.3″ wide
Three Usage Scenarios
You can use this backpack both as a photographic equipment carrier and as a travel backpack. For the latter, simply remove the inner padding. A mixed use is conceivable, too.
As a Pure Photo Backpack
For medium-sized jobs, this backpack holds my most important equipment:
- in the main compartment
- 2 DSLR cameras
- 3 lenses
- 2 flashes
- replacement batteries and chargers
- various small parts for photography, flash and video
- power cable, power adapter, USB cable
- in the outer compartments
- laptop & iPad
I carry my large tripod mostly by hand, but it could also be mounted with the previously removed strap on the backpack side.
As a Photo Backpack With a (Two-) Daypack
This is the most attractive variant for me. When I go to give my two-day workshops, I pack some small demo equipment as well as change clothes and toiletry items. Everything fits in this backpack so I can travel with only one piece of hand luggage.
- in the main compartment
- 1 DSLR camera
- 2 lenses
- travel tripod
- various small parts for photography
- folding rule
- presenter
- camera datasheets for participants
- power cable, power adapter, USB cable, HDMI cable
- small laundry bag
- flat laundry bag (shirts, T-shirt)
- in the outer compartments
- Laptop & iPad
- in the lid compartment
- toiletry bag suitable for carry-on luggage
As a Travel Backpack
Here every configuration is conceivable. In addition to change clothes and toiletry bags, the backpack holds 1 shirt, 1 sweater, 2 T-shirts, 1 pair of pants, loafers and of course a laptop and tablet. This puts you in a good position for the weekend trip.
What I Do Not Like
The list of concessions that have to make is relatively short so far and certainly I can get over it for my purpose:
- The flexible nylon dividers in the main compartment and the main compartment itself would be better completely covered fleece material, like you can find in many other bags. Then the backpack could be completely customizable.
- The sliders for the most important zippers unfortunately have no enlarged eyelets for attaching a lock or steel cable. If they existed, the backpack could be locked and secured.
- The brand imprint „inateck“ looks very cheap. Meanwhile, other products from the same brand have a raised emblem, which results in a nobler impression.
Conclusion
So far so good. Finally this backpack fits my wishes. It also makes a very good first impression. And it promises to be very versatile.
Now it depends on how it proves itself in practice. As soon as results are available, I will report here.

