
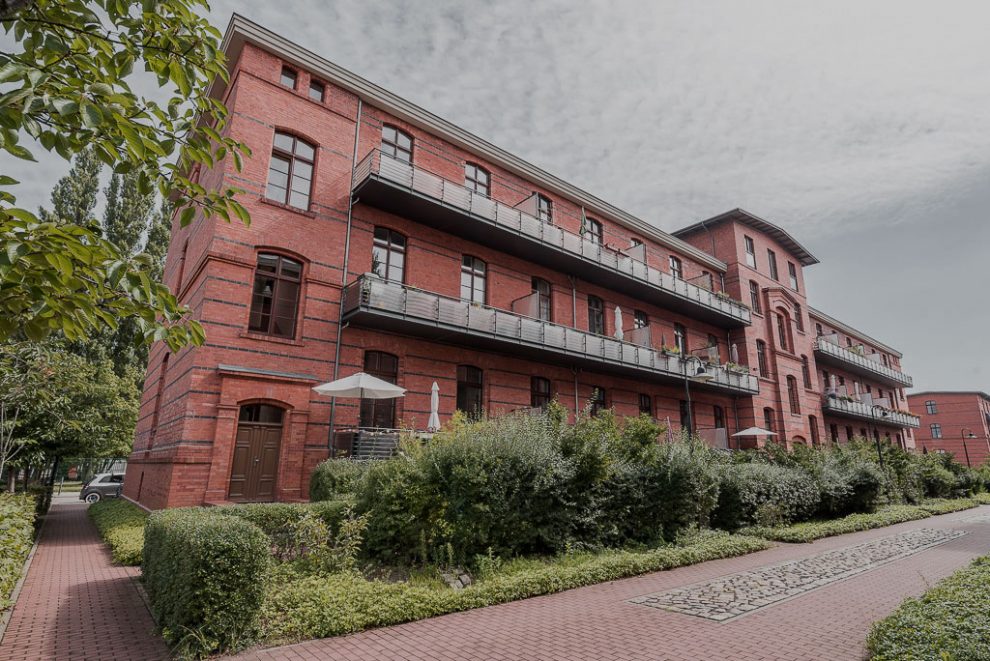
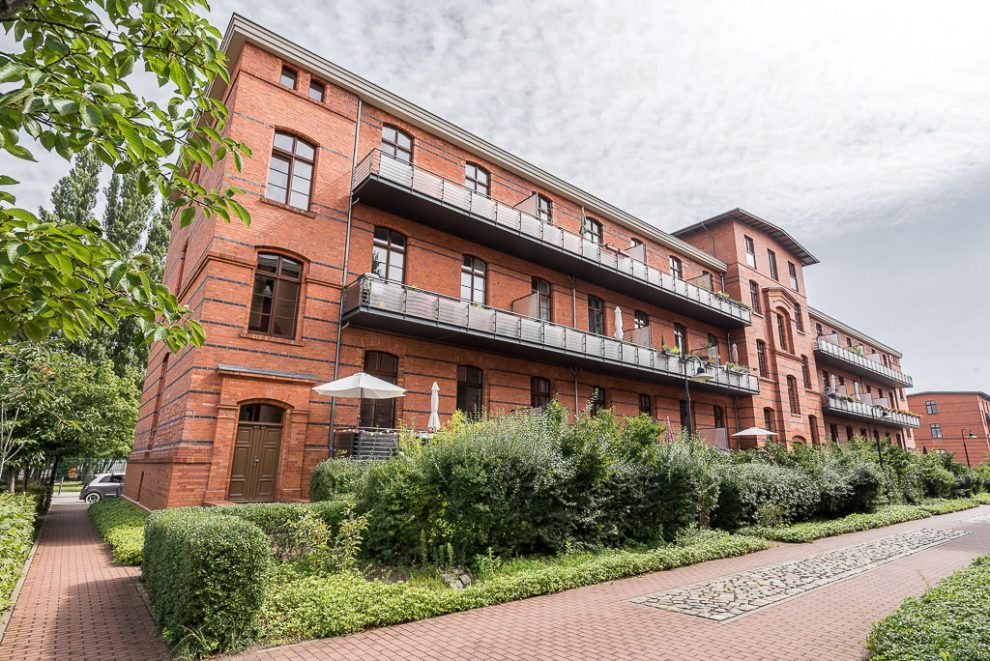
 Whenever it comes to image editing during my real estate photo workshops, one of the participants always raises the question of how to swap the sky quickly. Finally, objects displayed in bright weather would sell better. This is understandable, especially since we feel warmth and light as pleasant and therefore a new living environment or a new investmen tlooks more beautiful in sunshine.
Photoshop Helps Perfect with Compositing
Conducting such a project is fairly easy with current software products. In technical jargon this blending of different image elements is called „compositing“. If you know, for example, three tools in Photoshop (layers, layer style color range, masks), this is also a fast procedure. Many real estate professionals also believe that their existing software can do so at the touch of a button. However …
… a photorealistic result requires special compositing techniques. Unfortunately, I have to destroy my workshop students‘ believe that a realistic transition from cloudy to sunny photo weather can be done „just like that“. Just to change the sky alone is not the only task.
Mistakes for Bad Retouching
If certain parameters of the elements to be combined do not match, photorealism cannot be achieved. This results at max in a mediocre collage. The observer may not be able to interpret that exactly at first, but realizes that „there is something wrong with the picture“. He feels uncomfortable after having looked at the image for a while. But any uncertainty at the very first contact should be avoided in any case, because this may deminish the client’s confidence in your professional service right from the start.
Therefore, I would like to show here what you have to look out for, when it comes to a photorealistic exchange of the sky. If you know the following sources of error, you can avoid some pitfalls
1. The Right Images for Sky and Foreground
First, the individual elements must technically match each other. That is, the sky to be integrated should be photographed in the same direction as the property. The time of day, the season and latitude also play a role. In winter, the midday sun is lower and throws different light than in summer. In the morning and evening there is light from a different height and with a different color than at noon. And an alpine sky always has a different light mood than the sky in Scandinavia.
It is recommended to create systgematically a small database with different beautiful skies. You can do that in three steps
Step 1
First of all, the viewing angles of the images should match each other. To do this, it is best to walk in the middle of a clear field, golf course or bridge with an unobstructed view of the horizon. Then take a photograph of the sky, including the horizon line in the lower part of the picture. Turn around your own axis and take a photo in 45 ° increments. Then you have 8 shots, which you can name with the respective compass direction.
Step 2
Different times of day should also be taken into account. The sun is at different heights, clouds are illuminated differently and different light colors are generated. Take a picture of the scene from point 1 every two hours in sufficient daylight, for example at 10 am, noon, 2 pm, 4 pm. That would be 32 shots, to which you can also add the time. In the winter months you can save the 4 pm appointment. But in summer there will be a sky shoot at 6 pm.
Step 3
Repeat the whole thing once every other month (also note again in the file name). This would finally result in 192 sky pictures. This sounds like a lot of photos, but is not completely unimportant for a more realistic implementation. Pleasant side effect: You now have a variety of different cloud images of your area, so not all of your shots must be provided with the same sky image.

Exchange sky from the database, file name: „sky-feb-12-sw.jpg“
Free field with visible horizon line, taken 02-27-2005, 12:02 pm, southwest direction
The lower part is irrelevant, because this will be covered by the property and its surroundings.
Now you just have to know the direction, date and time of your property image. With this info you can assign and use a photorealistic sky. It is important to match the horizon line as precisely as possible when superimposing both images.
Tip
You have to cheat on the focal length you want to use. Ideal, of course, would be an angle of view, which corresponds to the focal length of the real estate photo. Extreme focal lengths, however, are stretched so far that they depict a horizontal gradient from very bright to a strong blue from the sky. This looks unnatural in compositing. Therefore I recommend to stay in the wide angle range, but to act above 35 mm (full format). This value is approximately 24mm for the DX / APS-C format and approximately 18mm for the Micro Four Thirds (MFT) cameras.
2. Matching the Light Color with Time of Day and Season
Most agents‘ collages suffer from bad colors. When the sun is shining, certain colors become more intense depending on the position of the sun, i.e. the time of the day and the season. To adjust the color of light of the real estate photo and the sky photograph, there is a little trick.
- Always have a white-gray reference surface in the images of your sky database. This can be, for example, a piece of white paper lying in the foreground on the floor. This sheet does not appear later in compositing, since we only need the sky.
- Before joining, use this white-and-gray area to determine the correct neutral values for the color temperature and toning and, at the same time, correct the sky image for this neutral lighting scene. In many image editing programs this can be done with the white balance correction by one mouse click.
- Now manually apply these values to your original estate photo. Thus, both photos have the same color. The real estate image may now have a strange color tint. This will be re-corrected after the images have been finally joined to one level – again with the white balance function.
You’ll be surprised how much more realistic the sky will look like.
3. Change the Brightness and Saturation of the Sky
Any real estate image on a dull day always looks flat by nature. You can raise the contrast and make it look a bit friendlier, even an improved black and white point help the picture to show more crispness.
Left: Original shot as it came out of the camera.
Right: Contrasts raised, black and white point set – picture is noticeably crisper.
However, the photographed sky often shows a dark and strong blue as the background. My Advice: Increase the brightness and reduce the blue saturation, so that they match the mood of the originally flat real estate photograph.
Left: Blue original sky exchanged – very unnatural look.
Right: Less saturation, more brightness in the sky’s blues – that looks a bit more realistic.
4. Shadows and Reflections Can only be Corrected with Special Effort
When direct light, such as sunshine, illuminates a scene, there are harsh shadows. Every single object casts these shadows – the roof box, the balcony or terrace furniture, individual plants and leaves, the window niches, the fence, etc.
However, if you have photographed the original scene on a dull day, these shadows are very blurry and soft, as a cloudy sky always emits a very diffused light.
The same applies to reflections on shiny surfaces such as window glass, stainless steel components, painted surfaces and the water surface of pools and garden ponds. These would be much stronger and more detailed in directional light than in a diffused gray sky. In addition to the reflection of the environment, the reflection of the blue sky must also be considered in the photo result.
Ways to work this
Making photo-realistic corrections of shadows and reflections in image retouching process requires an enormous effort of several hours or even several days, which is rarely justified by a real estate photograph.
One way to replace the missing sun could be working with artificial light. But the small built-in camera flash or the large on-top flash and even the normal studio flash unit does not have enough power to simulate the sunlight for a whole house facade. Again, the direction and height of the light source must correspond to the current position of the sun. You would need an illumination like on a movie set.
The bottom line is that the shadow and the reflection formation are exactly the Knock-Out criterion for a photorealistic composit. Our subconscious tells us that with a blue sky, the sun is actually shining and therefore hard shadows and reflections must be present. But in the foreground you look for them in vain.
At this point, we realize that „something is not right.“ The observer is triggered by the initially mentioned feeling of uncertainty.
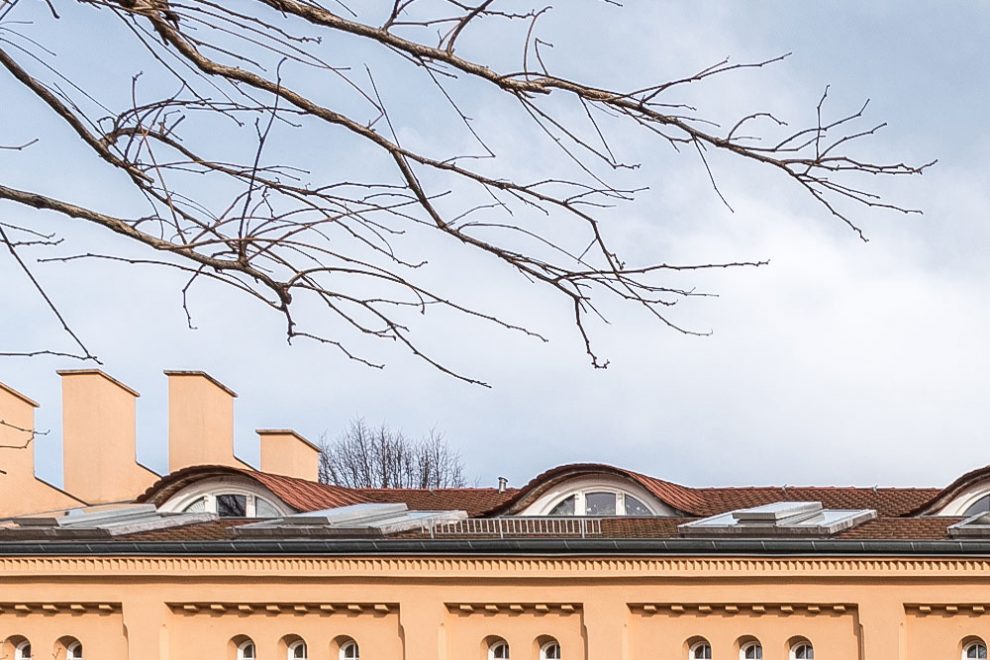
5. Clean Edges for the Sky Section
Digital photos consist of pixels of different colors and brightness. Color and brightness transitions never abruptly happen from one pixel to another. Diagonal edges would show ugly staircase artifacts. For this reason, a transition from the roof line of a house to the blue sky, for example, requires at least three pixels, usually even more pixels, to give a realistic picture.
How many of these transition pixels should now be deleted in order to make the image appear realistic, is up to a trained eye of the image editor. If there are too many transition pixels left from the original white-gray sky, the roof has a white border. If you cut out too many pixels, the transition is unnaturally abrupt.
With straight edges of a house or smooth geometrical forms, this might still be possible with the geometrical selection tools of conventional software. But as soon as nature comes into play, for example with leaves and branches in the image, it gets problematic. For a good illusion you would have to work pixel-perfect, but this inevitably costs a lot of time.

Detail enlargement of a simple montage
Left: Photo with gray sky.
Right: Photo with replaced sky – whitish edges around each branch.
Professional software can be quite helpful here, but still you should master more than one technique (more like three or four) to replace the sky in a photorealistic way.
6. Image Details Should be Identical for Both Images
We must not forget that we combine two completely different photos. So for a realistic impression they should have the same character.
It is ideal if the shots come out of the same camera and were recorded with the same basic aperture and ISO.
The aperture is used to transmit the lens characteristics (sharpening, blurring, visual flaws). And with the ISO value, the image receives a certain noise.
These two features give each shot a very specific look. If this is the same in both photos to be mounted, our brain can be cheated a little easier.
Again, you can make many adjustments in retrospect on the computer – but the time factor may question an efficient result.
Now You Have to Decide if You Want to Swap the Sky
It is best, of course, if you take pictures in the right weather. However, this is not always possible in our latitudes. So I know many real estate professionals who take the time and plan a second impromptu appointment for the outdoor shots when the weather is okay.
Retouching sky in post production is a skillfull task and sometimes requires some effort. Everything below this quality claim, I would never publish, because after all, the principle applies „real estate photos are commercial images“. And that does not just refer to the sale of an object but rather to the self-promotion of the real estate professional. Because the first impression counts. A photo can decisively help or even destroy a new business relationship. It is usually impossible to iron out a mediocre or even bad start.
A mediocre image correction, paired with the statement „That’s enough for my purposes,“ is therefore unacceptable.
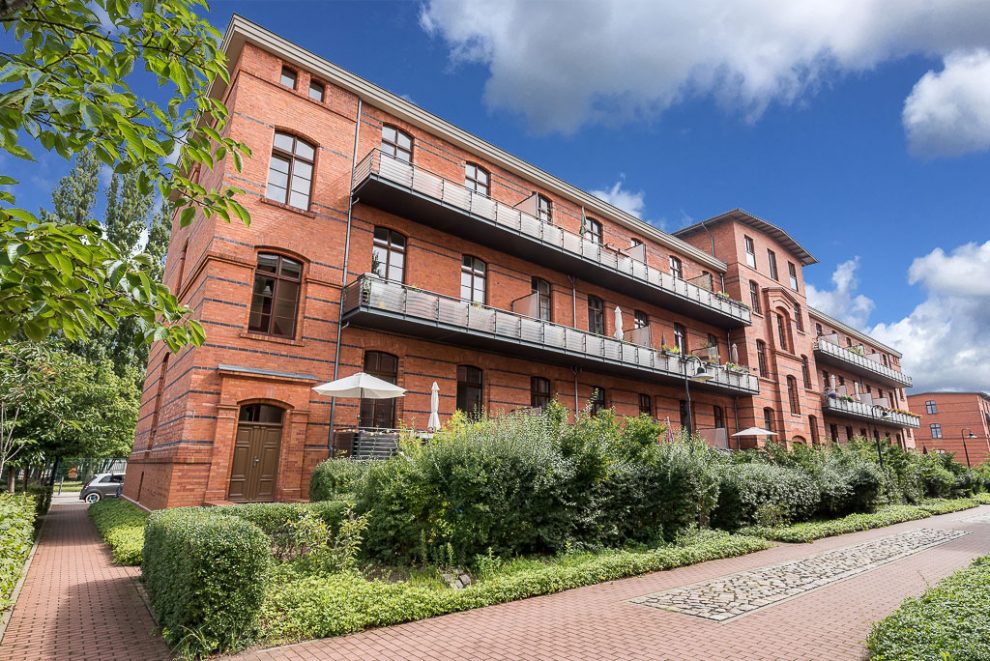
Incidentally, I myself do not replace gray skies with blue ones. At best, I may swap a boring, completely blue sky to a beautiful cloudscape.
As time allows, I address the necessary basic skills and some advanced techniques, that can also be used for the exchange of skies, in my image-editing workshops. But only after the participants have learned in detail how they could make their own images shine with my approved 8-step workflow.