

We have really good image editing programs at hand these days, but you still hear the hint that we should be photographing real estate correctly in-camera. That sounds pedantic, or know-it-all, or even old-fashioned. But there is still something to this tip. Or?
I’m a purist in many ways. I love it when my photos look realistic and at the same time I want to minimize post-processing time. This simply leaves more time for more business.
It will not be any different for real estate professionals who take their own photos. For many of them, image editing is more of a burden than a pleasure, so they certainly have better things to do with the time spent on it. When they hear the phrase, „You should photograph real estate correctly,“ some of them feel peeved because they think photo editing software is a comfortable way to give their photos the look they want.
Honestly, all of my real estate photos are edited, even though I took them beforehand according to all the rules of photographic craftsmanship.
Time Travel: Photographing Real Estate correctly despite Image editing
There are photo ascetics who consider it dishonorable when pictures are polished on the computer before publication. These eternal admonishers like to summon analog photography when film was not yet manipulable. But even in the analog days, photos were heavily edited. Each individual image had to be transferred from the negative to photographic paper in the darkroom in order to become a photograph during the following positive chemical development. And at the latest here a large part of the image processing took place. The image results could be massively influenced by the concentration of chemical substances, their temperature and the duration of treatment.
This was time-consuming and expensive, and required a dark room and some equipment. If an exposure failed, the tremendous process would start all over again with a new, valuable sheet of photo paper.
Of course, the masters of their trade spent a lot of time experimenting in the laboratory to find their style. Renowned landscape photographer Ansel Adams has often spent entire days in the darkroom trying to get the one perfect print. These masters could afford it because they sold their work for good money, so the time and effort paid off.
However, the prerequisite was always that they had previously photographed their subjects in a technically correct manner – preferably with the laboratory process in mind.
Photographing Real Estate correctly Saves Time and preserves Quality
Today we live in a digital world, which makes post-processing itself relatively cheap, obviousely easy and feasible for almost anyone with average computer skills. The scope and nature of the manipulations are immense.
But still, you can hear photographers say that you should photograph real estate correctly first – but this does not necessarily derive from the craftsmen’s pride from these analogue film days. I too think that there are still good reasons for technically correct photography. It’s always about saving time and maintaining high image quality.
The hope that an average photo can be turned into a top notch image with just a few mouse clicks will not come true. Because almost every subsequent correction on the computer often takes more time than correct photography on site.
Here are three typical examples from real estate photography.
1. Exposure
For example, if you choose the right exposure settings on the camera right away, you save later corrections on the computer screen. And not just for one photo, but with the right know-how for the entire series of images of an entire property. It goes without saying that you shouldn’t rely on the camera’s automatic beginner functions (full-automatic, ISO automatic). They are not at all suitable for the special lighting conditions of real estate photography. In addition, the image quality suffers with every massive intervention in the tonal values (brightness, contrast, shadows, highlights, etc.) on the computer. With incorrect ISO values, this is then expressed, for example, in very unpleasant image noise or color casts, which is by no means desirable for the documentation of real estate.

The right exposure settings: Left: Image A was taken with the camera’s full auto mode. The bright windows are dominant, the interior is underexposed. Thustonal values were subsequently adjusted on the computer. However, this results in heavy image noise in image section B. For image C, the exposure has already been corrected in camera. The subsequent image processing could be done moderately, so that no disturbances are noticeable in image section D.
2. Vertical Lines
A second important area is a correct image structure. If the camera wasn’t exactly aligned when taking the picture, this correction for nice vertical (and sometimes also horizontal) lines has to be made on the Computer. So you have more work afterwards. But what’s even more annoying: Every time the photo is rotated or every time the converging vertical lines need to be corrected, areas are inevitably cut off at the edges of the image. However, if there is important information for the image message (doors, windows, built-in furniture) or for the aesthetics (design elements, furniture, lines of sight) you are faced with the dilemma of either having to artificially paint in the lost image areas or brutally cutting them off. The first takes a lot of time, the second damages the message of the picture. There is no other way.
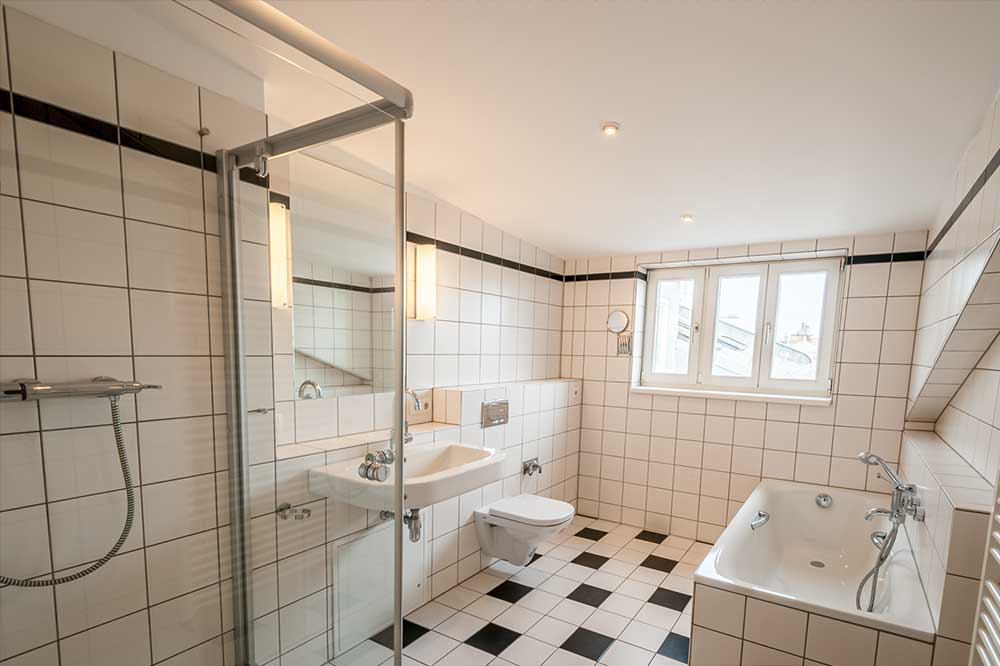
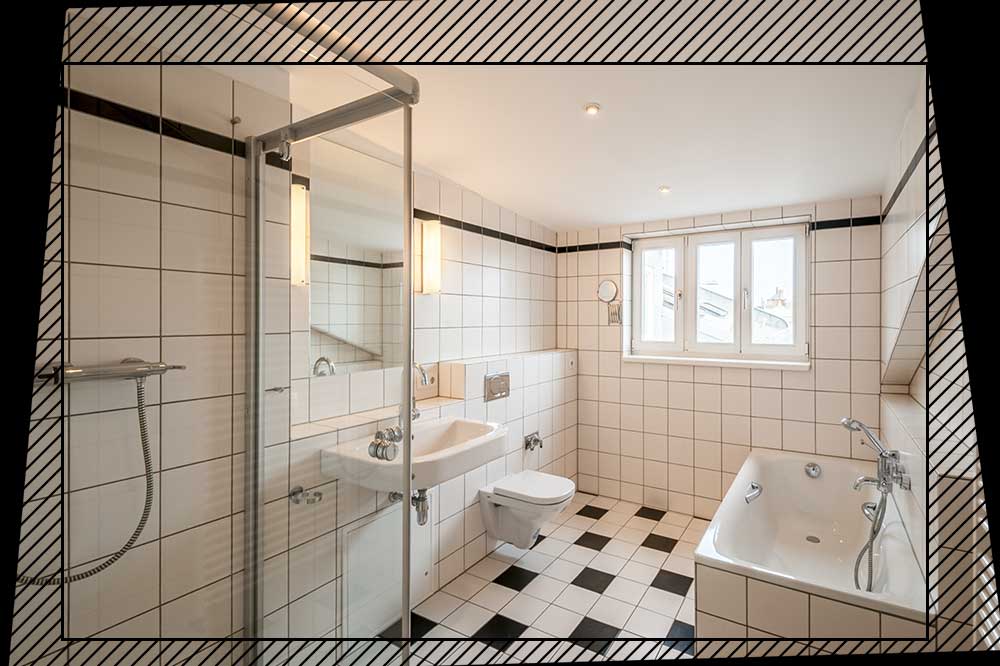
Left: Camera tilted and slightly twisted while shooting. Right: Same image perfectly aligned on the computer.
The black areas could be replaced with great effort. But it is simpler to use the remaining image.
However, the hatched areas are lost (while maintaining the aspect ratio).

If the camera is properly aligned when taking the picture, the image area contains much more usable information and potentially important image areas at the edges of the image does not have to be cut off. The exact alignment on the PC is later only a small intervention (see below).
3. Focusing
And then there is another quality criterion that cannot really be corrected in image processing: image sharpness. A really blurry or shaky photo cannot realistically be converted into a sharp image, because missing details at the blurred edges cannot be easily replaced. There are special programs that try to solve this problem with artificial intelligence. However, it is always easier to create a well-focused image that already has the necessary brilliance.
Image Editing still Required
And yet I don’t present any of my own real estate photos without having them finalized on the computer beforehand.
This has to do with the special circumstances (lighting conditions & space) and requirements (aesthetics & truthfulness) of the real estate photography genre.
Here are four typical examples from real estate photography.
1. Dynamic Range
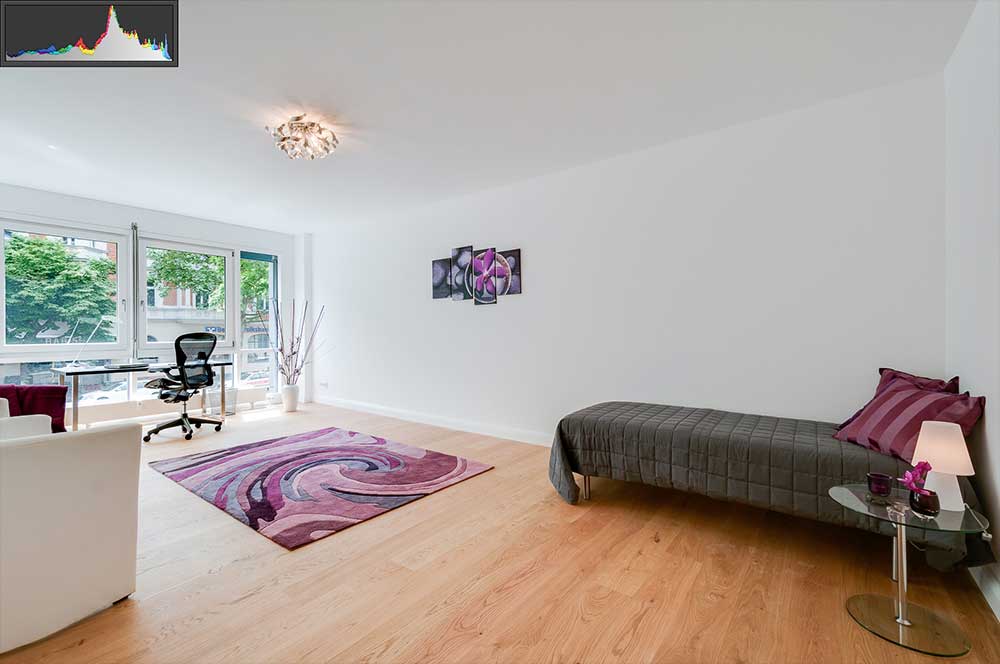
Compared to our eyesight, even professional photography technology can only capture part of the perceptible brightness spectrum in a single photo. So we can see more dark and light areas at the same time with our eyes. An unedited photo always shows details only in the light or in the dark areas. So windows are often overexposed or interior areas are underexposed. Various image processing techniques (HDR) in connection with the right shooting mode(bracketing) and the appropriate file format (RAW) help here. They increase the so-called dynamic range.
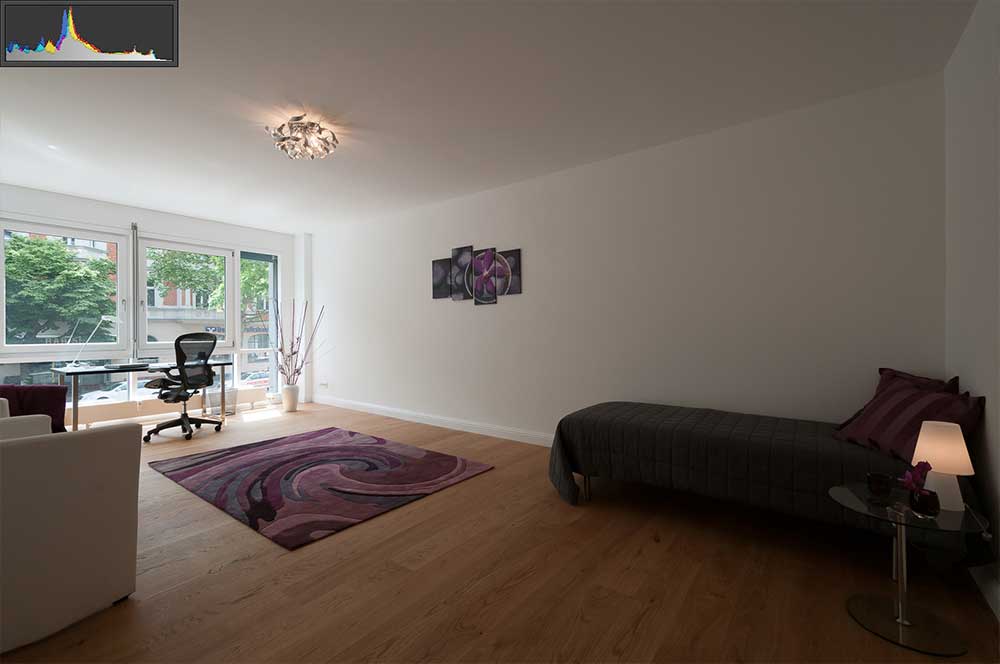
Left: Photo with the light metered in the camera – the outside view is well exposed, the dark areas inside have too few details.
Right: HDR image created later from bracketing three images – details are visible both outside and inside.
The histogram (top left) shows the distribution of the brightness values.
2. Perfecting Vertical Lines
Even if we have already aligned the camera very well, you can still perfect the whole thing in image processing. Well-produced source material keeps image loss at the edges to a minimum and ugly distortions can be prevented.
If the correct alignment of the camera was already a very good approximation (left), the subsequent fine adjustment on the computer creates
an exact result (right). The image loss due to the minor correction is only minimal.
3. Deficiencies of the Optics
Lens technology that is affordable for amateurs and professionals is always a compromise. In real estate photography, wide-angle lenses are often used to show rooms in one picture if possible. However, these lenses have more or less visible flaws, especially at the edges of the image (dark corners, curved edges, color fringes). These need to be corrected in image processing. If these errors were already corrected in optics, the lenses would be prohibitively expansive and probably also large and heavy.
4. Local White Balance
Our brain can compensate for color casts that we see in an original scene. We don’t particularly notice the difference between the blue outside light that comes in through windows and the warm moody lighting inside a room. A camera is incorruptible when it comes to colors of light. It clearly shows different light tints in a photo. Harmonious coloring can only be achieved in post-processing.


Left: The light coming in from outside has a very high proportion of blue, while the interior lighting is quite warm.
Right: This shortcoming can be compensated for in the software.
With the professional programs Adobe Lightroom and Photoshop, we now have powerful tools in our hands for comparatively little money that enable almost any image manipulation. In order to create a realistic image, however, a good eye and some practice are necessary. And of course, the manipulation of real estate photos must not end in fake images.
Conclusion: Photographing Real Estate sorrectly – it cannont work without
A technically clean photograph is always an advantage for a good real estate photo. Because experience teaches us that it is much more time-saving to take the correct photos right away than to improve the images later on the screen, which is time-consuming.
Nevertheless, there are still enough minor corrections left in each photo that require subsequent image retouching to give the photo the final polish.
In the end, it’s about efficiency and quality. In order to master both disciplines, it is advisable to briefly go back to school.
Links on Topic
Personal Coaching for Real Estate Photography and Image Editing