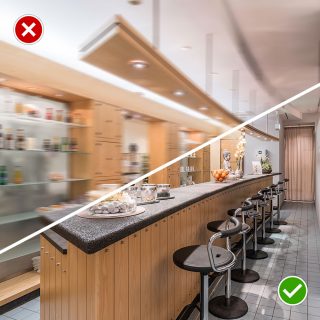
 Of course, any mobile photographer would like to travel with light and small luggage. Those who take photos of real estate, often change their location and therefore have the same desire. Nevertheless, there are some good reasons why you should use a tripod when photographing.
Real estate photos have to meet some quality requirements, which cannot be easily achieved due to special shooting conditions. Nevertheless, we want the sharpest possible pictures. And they should be in focus from front to back and also have a detailed and clean image style. All three exposure factors – aperture, exposure time and ISO – value play an important role here, but make life rather difficult for freehand photographers without a tripod. The main reason is, that we often have poor light when shooting indoors.
In addition, a sturdy and repeatable camera position is invaluable. A tripod can almost always be placed freely in the room. It thus enables an ideal camera setup from which you can repeat images immediately if necessary.
To achieve all this, a tripod is a great help. My recommendations for can be found in my equipment tips for real estate professionals.
➀ Avoiding Shaky Images
There are various reasons for shaky pictures. For real estate photos, the most common reason is, that the camera was unintentionally moved while capturing the frame. Before you can take hands-free photos, you must acquire a certain technique to avoid this recording error.
However, there are also clear limits to one’s own skills. These are determined by the focal length, a possible image stabilization in the camera and the level of your own excitement (coffee, hurry, nervousness). On a camera with normal focal length experienced photographers can take sharp images hands-free at no more than 1/15 second. With longer exposure times, they also create shaky photos.
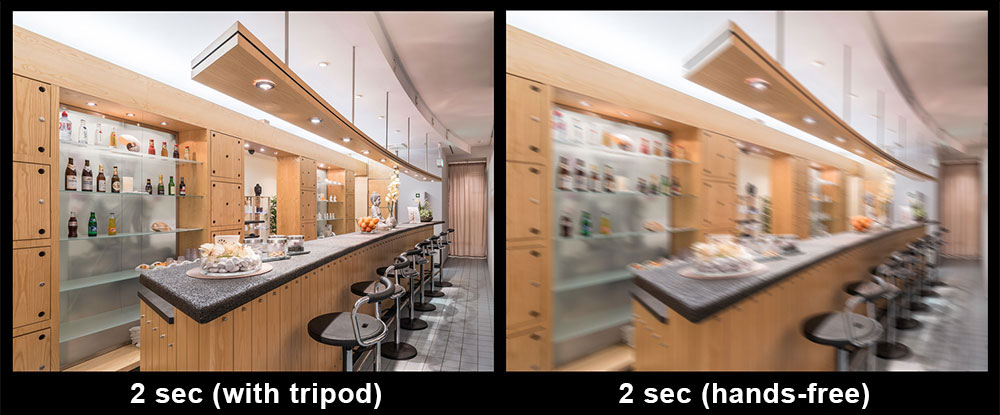
With a tripod, images can be taken without shaking. The camera measured an exposure time of 2 seconds. A person cannot hold the camera still for such a long period (right image). On the other hand, sharp photos are taken from the tripod (left image).
When shooting interiors, it is often so dark that the camera measures significantly longer exposure times. Therefore, shake-free photos can only be made under compromises, for which you would have to accept deminished image quality in return. More about this in the following two sections.
Photographing from the tripod enables you to optimize all these factors for strong real estate photos.
➁ Fighting against Image Noise
At first glance, this goal may not necessarily be an indication to use a tripod. However, if you look at the usual camera settings, you will notice, that under the dark shooting conditions for real estate photos, the ISO value is often automatically raised. This allows the camera sensor to work harder with the low available light.
However, a high ISO setting has the unpleasant consequence that individual pixels of the sensor act less accurately. As a result, a recognizable noise pattern occurs in areas of the same color and in dark parts of the image (walls and shadows).
If you additionally perform intensive image processing of the tonal values on the computer, this noise increases enormousely.
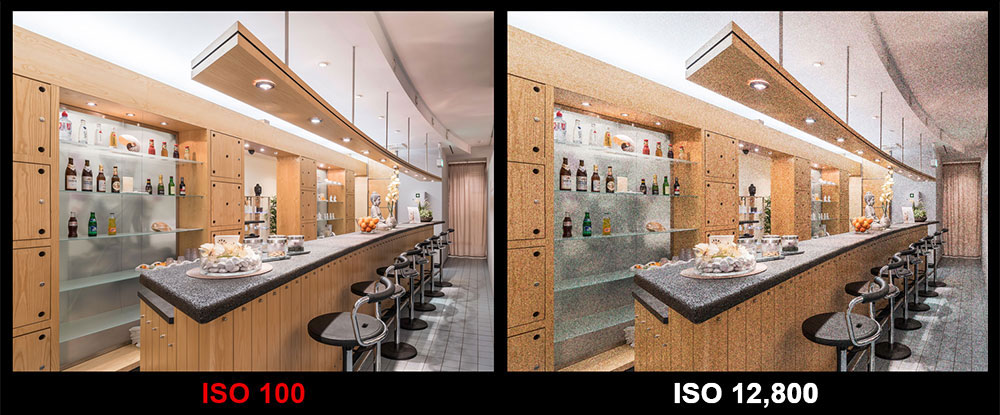
Strong image noise due to automatically set high ISO value (picture right). If you manually set this setting to a very low value, the noise disappears (picture on the left). At the same time, however, the exposure time and the risk of shake may increase. This in turn is avoided when you use a tripod.
However, if you photograph from the tripod, you can confidently set the ISO to a low value. Instead, you compensate for the lack of light through corresponding settings (aperture, exposure time – also partly automatic). This is how you create a well-exposed photo with barely perceptible noise. Since in most cases the exposure time is very long, it is important to keep the camera stable during capturing the image. So what could be more obvious than using a tripod?
➂ Extending the Focus Range (Depth of Field)
In order to achieve the widest possible focus range when shooting interiors holisticly, the aperture on the lens must be stopped down. There is an optical rule according to which the focus range increases when the opening for light entry is reduced.
Short-sighted people will know the old swimming pool trick: There is a clock hanging on the wall that you cannot read from a distance without glasses. So bend your index finger strongly so that only a tiny light hole is created. If you now hold this hole directly in front of the eye and target the clock, you can suddenly read the time in the distance. You have virtually reduced the aperture for your eye very much and thus increased the sharpness performance.
Now you do the same is with your camera lens. Stop down the aperture and thus reduce the opening through which the light enters the camera. This significantly increases the focus range. For good exposure, now the reduced amount of light needs to hit the camera sensor for a longer period of time.
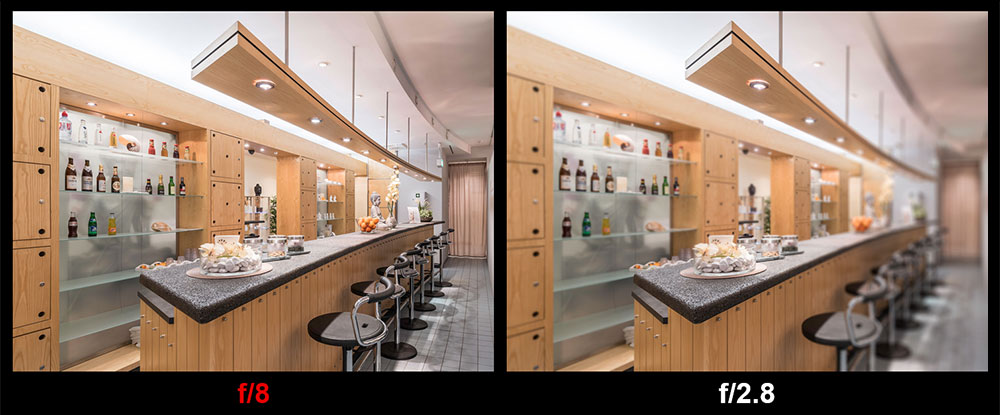
Small focus area due to wide open aperture (picture on the right). Ideally, the depth of field increases to the entire room when the aperture is stopped down (picture on the left). In return, the exposure time must be increased for a sufficient amount of light. This again increases the risk of shake. However, not if the image is taken from a tripod.
However, the longer the exposure time, the greater the risk that the camera will shake. If you now use a tripod, you significantly reduce this risk.
Therefore, when shooting from the tripod, you can simply stop down the aperture and still produce shake-free images.
➃ Repeating single frames
Once you have found the ideal viewing angle, aligned the camera precisely and taken the photo, there are always situations in which you should better put the camera on a tripod. I imagine two scenarios right away.
A. Subject Correction
You look at your image on the camera monitor and notice that there are still disturbing elements in the subject that could not be corrected easily later on the computer. So you make the correction directly on the subject and take the same photo again. If you had previously mounted the camera on the tripod, you have no trouble reproducing the previous camera position immediately.
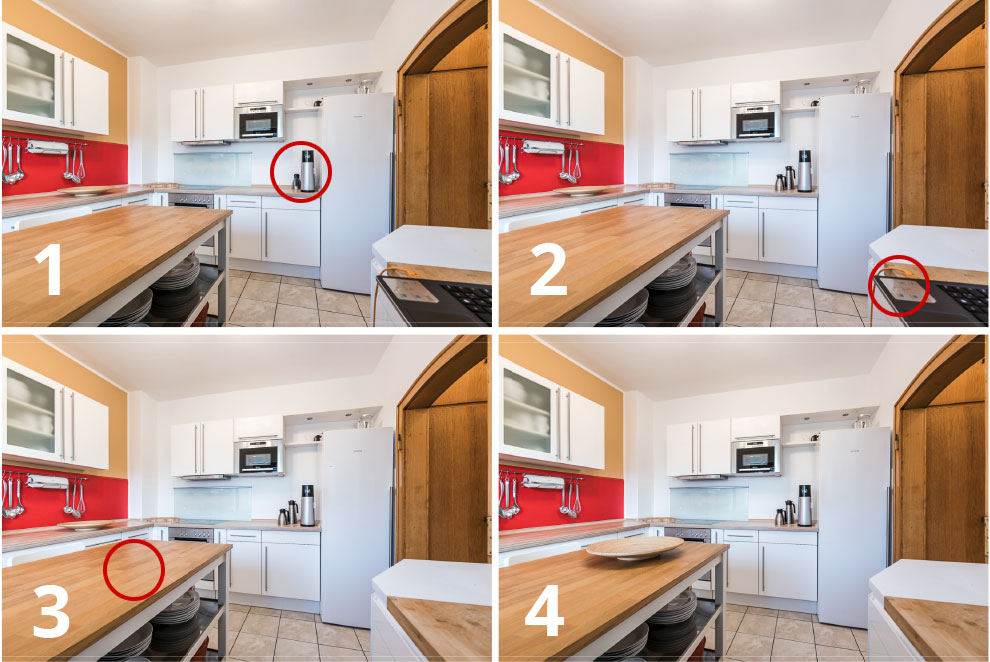
If you use a tripod, it is possible to repeat a shot at any time. This series is from a photo coaching with a broker. In Figure 1, the position of the vessels interferes with. In follow-up picture 2, the PC is in the picture. Figure 3 still shows this huge empty area in the foreground. Only picture 4 gives a harmonious picture of the tiny kitchen.
B Exposure Correction
You are not quite sure whether the measured exposure in your camera is really ideal (real estate scenarios sometimes trick the camera’s exposure meter). So set the camera a little lighter or darker and take one, two or more images for safety (tip: In every modern camera there is a function that automatically creates such exposure bracketings). Again, it is extremely time-saving if you don’t have to align the camera every time.
In addition, these perfectly aligned shots with different brightness levels can be used very well to easily produce an HDR (high dynamics) image in post-processing, in which even the details appear in the brightest and darkest image areas.
How much effort do you have when using a tripod?
Investment
First of all, there is a financial effort. The purchase of a tripod for the weight and dimensions of a small equipment for a real estate broker costs around 120 EUR. If you want to use a lighter and sturdier tripod, you may need to spend more than 200 EUR.
Portability
Some real estate professionals put this kind of statemend as the reason for rejection: „A tripod is bulky and heavy. Carrying it around it is annoying.“ Yes, of course, the larger and heavier a tripod is, the more stable it keeps the camera equipment.
However, a good travel tripod is enough for the small brokhttp://lernener’s equipment. The demo equipment in my photo workshops for real estate professionals is currently on a 950 grams carbon tripod, which, when collapsed, measures just 33 cm in length and around 9 cm in diameter. For outdoor shots with strong winds, it is recommended to use the built-in cargo hook and weigh down the tripod (photo backpack, broker’s handbag, shopping bag with flour containers, etc.).
Handling
The argument that setting up a tripod and adjusting the camera would consume a lot of time can easily be invalidated:
- In my tripod test from 2019, it took me just under a minute for the complete setup and pack up including mounting and un-mounting the camera.
- The correct positioning of a tripod takes about five seconds per photo spot. You can keep the camera mounted on the tripod if you move within a property and exercise appropriate caution.
- Adjusting the camera on the tripod takes around three seconds for each shot with some experience.
Construction and setup of the camera consume probably the smallest time resources when photographing real estate.
Finally, a Bonus Reason
If you use a tripod, you have your hands free and can focus yourself more intensively on the actual subject. From this, in turn, benefits the image quality and the image statement.

