 Some real estate professionals obviously have a problem when it comes to selecting real estate photos for a listing. This applies to the number of images as well as to the right scenes and the image quality. They simply pour all the photographs that are somehow usable into their online exposé. Thus, they overwhelm and bore the viewer, who actually expects a detailed representation of a property, which in the first step has to convey the most important visual information for the property.
Laziness or doubts are the two most common reasons for this flood of images. This article shows how to make the selection and how to do it efficiently.
Selecting Real Estate Photos – how many?
A good basic rule says that for a single-family property (up to approx. 1200 sqft) 10 photos are a good starting point. The larger and more diverse the property gets, this number can of course be scaled up.

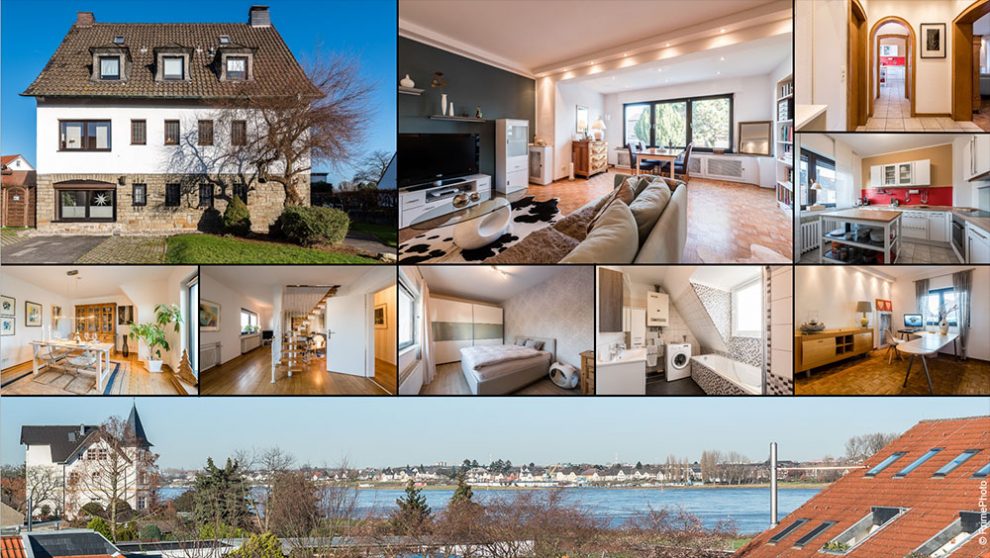
A typical series of images for real estate photos, from top left: facade, living room, hallway (with line of sight), kitchen, dining room, leisure room, bedroom, bathroom, study room, landscape view from the terrace.
However, even for a castle you should not exceed the magic number of 25 photos. It has been proven that most viewers are overwhelmed beyond this limit and the initial enthusiasm about this property can turn into rejection.
So limit the appropriate number of images. But you don’t have to trash the unused photographs. In subsequent direct customer contact, for example, when there are detailed questions before or after an on-site visit, you can shine with additional pictures.
Selecting Real Estate Photos – which ones?
The set of photographs should contain all of main features of a property. This includes:
- exterior view
(façade, if necessary side and rear view) - all living areas
(living room, bedroom, children’s room, dining room, study room …) - all utility rooms
(kitchen, bathroom …) - outdoor facilities
(courtyard, garden, terrace, balcony …) - optional: environment shots
(transportation, shopping, education, medical care …)
Make sure to present each room with only one photo. If you have captured multiple viewing angles, choose the best one. Make that decision on the big computer screen in your office. There is nothing wrong with supplementing a series of interior shots with a few detail images of the property’s absolute highlights.
Which Features of Image Quality should be considered?
When selecting real estate photos, it’s best to limit your choice to images with the best potential. These shots must have essential quality features out of camera, i.e. they should not require major retouchin. These are:
- image composition
(important image information should not be on the edges of the image – and for aesthetic reasons, by the way, not in the center of the image either) - exposure
(details must be recognizable in both the lightest and darkest parts of the image or should be recovered afterwards with simple means) - correct colors and color depth
(the colors simply have to be right, a higher bit number of the color depth on the camera helps to capture more nuances) - sharpness
(knock-out criterion – blurry images have NO PLACE in your presentation!)
Selecting Real Estate Photos Efficiently
With the right tool, the task of „selecting real estate photos“ can be accomplished quickly and easily. I use the standard software „Adobe Lightroom Classic“ and also teach the use of this tool in my photo editing workshops for real estate professionals. The main task of Lightroom is basic image retouching, while the included selection tool is a convenient help for efficient work.
Lightroom offers three ways to tag images without changing the image itself.
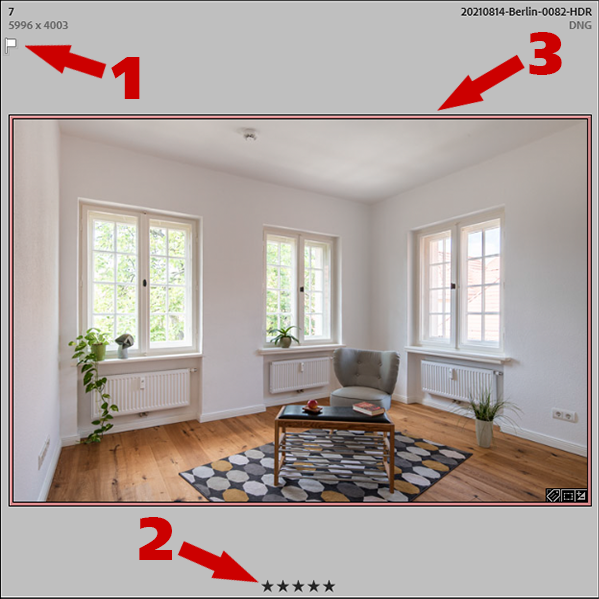
- white, black or no flags
- zero to five Stars
- colored frames (red, yellow, green, blue, purple, custom, none)
You can also combine all three options.
You can use the filter function to select the marked real estate photos.
That’s how I do it
-

Three ways for selecting real estate photos
With the above principles in mind, I select the image(s) by marking them with a white flag. The shortcut key for this is „p“.
- For a first look at the pictures together with a client, I can use the number keys „0“ to „5“ to quickly award just as many stars to every single photo. Also with large projects, you can rapidly reduce the number to a final set of images. In the first round, all good photographs receive one star. In a second round, I award three stars to the best 1-star photos and in a final run, the top photos receive 5 stars. These are then used for the presentation.
- If a new image is created from several source photos, the original files are given the same colored frame (red for HDR, blue for panorama). For images that are edited with external software (Photoshop), I assign a yellow frame. The resulting new files automatically have the same frame color. So I always know which photographs belong together. This is important so that you keep all the original files for later data cleansing and only delete the unused photos from your hard drive.
One good thing of Lightroom is that you can hide any unselected photos with a click of the mouse. This is important for overview and creates an impression of the series of images as they will appear later in the presentation before any retouching.
In addition, you can change each label in Lightroom at any time. Each setting will be retained even if the program is closed.

